Usage and Options
This page will cover using the meal plan (other than 📖 creating items).
Calendar vs List View
The meal plan can be displayed in two views. You can switch between them by opening the options menu in the top right corner and changing the View setting.
Calendar view shows your meals in a monthly calendar grid. It supports drag-and-drop to move items between days, and multi-day selection for bulk operations like copy and move.
List view shows your meals as a scrollable list grouped by date, starting from today. Past meals are tucked into a collapsible "Past Meals" section at the bottom so you can focus on what's coming up. Copy and move day operations are not available in list view.
Pinning Items Open
Pinning a Single Item
To pin an item, simply click it and select "pin this recipe open".
Pinning Multiple Items on a Day
To pin multiple items on a given day:
- Select the day you'd like to pin items open for
- Open the options dropdown in the top right corner
- Click "pin recipes open"
Note: You can pin multiple days worth of items at once on desktop devices. To do this, in step 1 just drag your cursor over all of the days you'd like to pin at once. Then proceed with the rest of the instructions as normal.
Moving Items
Moving a Single Item
To move an item to another day, simply drag it to the day you'd like it to be scheduled on.
If your device does not support drag-and-drop, you can:
- Click the item
- Click "edit this item"
- Change the date to the desired day
- Click "save changes"
Moving All Items on a Day
To move all items on a given day:
- Select the day you'd like to move
- Open the options dropdown in the top right corner
- Click "move selected day(s)"
- Click the day you'd like to move all of the items to
Note: You can move multiple days at once on desktop devices. To do this, in step 1 just drag your cursor over all of the days you'd like to select at once. Then proceed with the rest of the instructions as normal.
Copying Items
Copying a Single Item
To copy an item to another day:
- Click the item you'd like to copy
- Click "duplicate this item"
- Select the date you'd like to save this copy to
Copying All Items on a Day
To copy all items on a given day:
- Select the day you'd like to copy
- Open the options dropdown in the top right corner
- Click "copy selected day(s)"
- Click the day you'd like to copy all of the items to
Note: You can copy multiple days at once on desktop devices. To do this, in step 1 just drag your cursor over all of the days you'd like to select at once. Then proceed with the rest of the instructions as normal.
Deleting Items
Deleting a Single Item
To delete an item, simply click it and select "delete this item".
Deleting All Items on a Day
To delete all items on a given day:
- Select the day you'd like to delete
- Open the options dropdown in the top right corner
- Click "delete selected day(s)"
Note: You can delete multiple days worth of items at once on desktop devices. To do this, in step 1 just drag your cursor over all of the days you'd like to delete at once. Then proceed with the rest of the instructions as normal.
Printing
To print your meal plan, open the options menu in the top right corner and click "Print". A print-friendly page will open and your browser's print dialog will appear automatically.
The printed output respects your current view setting:
- Calendar view: Prints the currently focused month as a calendar grid, matching your "Start week on" preference.
- List view: Prints only upcoming items (today and future), grouped by date.
Adding to Other Calendar Programs
To add your meal plan to an external calendar program and keep it in sync, open the options menu in the top right corner of the meal plan page and click "share".
The link shown can be added to most calendar programs as an external calendar, so long as the calendar program supports ICS format.
For Google Calendar, you can add this link as an external calendar by:
- Copy the ICS link shown in the share popup
- Open your Google Calendar
- Click the + icon in the left sidebar where it says "other calendars"
- Click the "From URL" option
- Paste the ICS link you copied from RecipeSage into the "URL of Calendar" field
- Click "Add calendar"
Your meal plan should automatically sync to your Google Calendar.
Note: Google Calendar (and some others) will only sync updates every 24 hours. There's nothing that RecipeSage can really do about this unfortunately - it's a platform limitation imposed by Google.
Offline Use
Meal plans can be edited while offline. You can add, edit, move, and delete meal plan items without a network connection. Your changes are stored locally and will automatically sync to the server (and to anyone you share the meal plan with) once your connection is restored.
Options
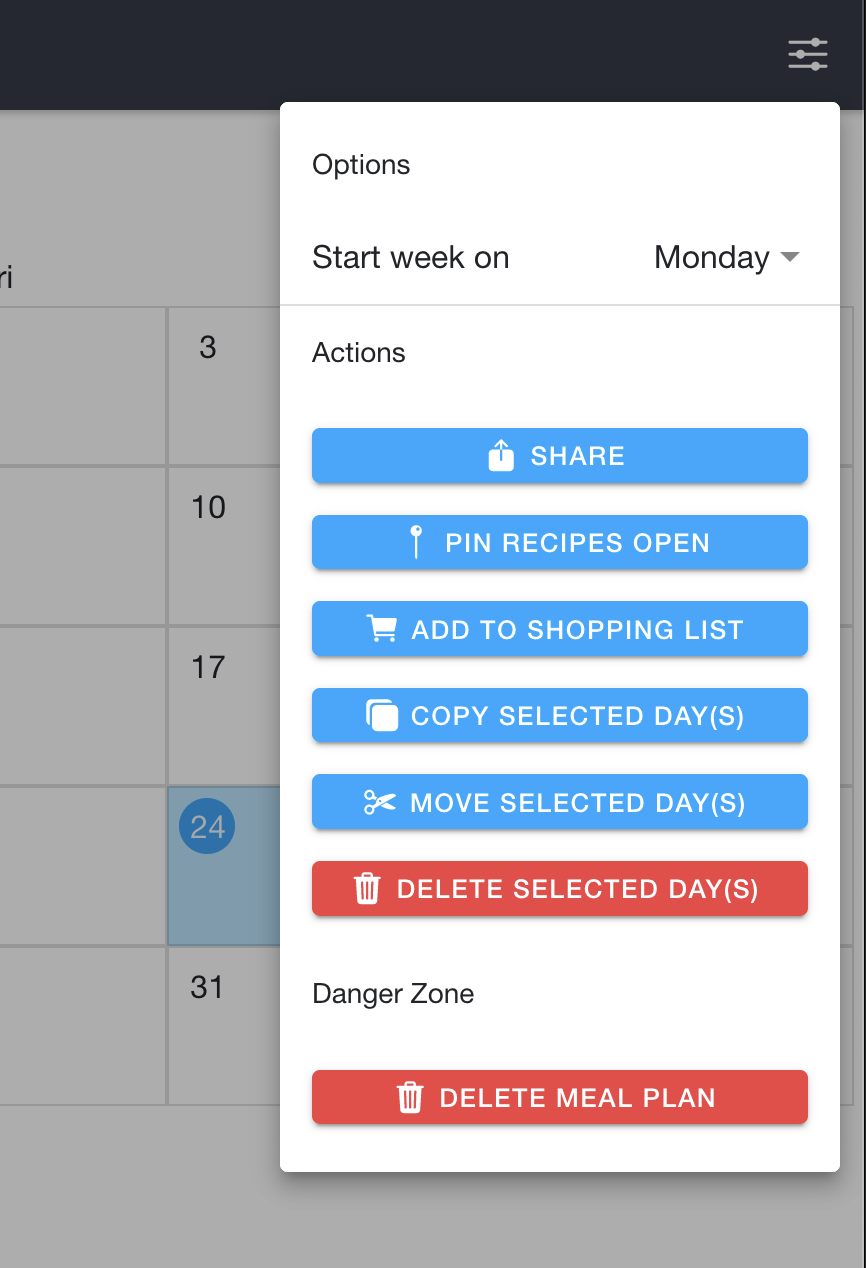
View: Switch between "Calendar" and "List" view. See Calendar vs List View above for details.
Start week on: Switching this setting will change how the calendar is displayed. "Monday" will show weeks as Monday-Sunday. "Sunday" will show weeks as Sunday-Saturday.
Custom Meal Options
By default, meal plans include five meal types: Breakfast, Lunch, Dinner, Snacks, and Other. You can add your own custom meal types and control the order they appear in.
To configure custom meals:
- Open the options menu in the top right corner
- Click "Manage meal plan"
- Click "Customize Meal Options"
- The five default meal types are shown with their default colors. You can change the color of any meal by clicking the color circle next to it and picking from the preset grid or entering a custom hex code
- Add your own custom meal names using the text inputs. A new empty row appears automatically as you type
- Remove a meal by clicking the X button next to it. Any default meals not listed will appear after your custom entries
- Click "Done" to confirm your changes
- Click "Update" to save the meal plan
Meals will be displayed throughout the calendar, list view, and when printing in the order they appear in this list.
Custom meal options can also be configured when creating a new meal plan.
Note: Only the meal plan owner can configure custom meal options.
Actions
These bulk actions are explained in the other meal plan guides. You can use each by selecting a day (or multiple days), then clicking one of these buttons. The action will then be applied to all selected days.