Usage and Options
This page will cover using the shopping list (other than 📖 creating items). This includes checking off items, as well as smart grouping options.
Video Guide
This same video also appears on the 📖 creating lists and items and 📖 sharing pages, since it covers shopping lists as a whole. Think of it as a visual overview to help you get oriented. It does not cover everything, so read on down this page for the details specific to using the shopping list.
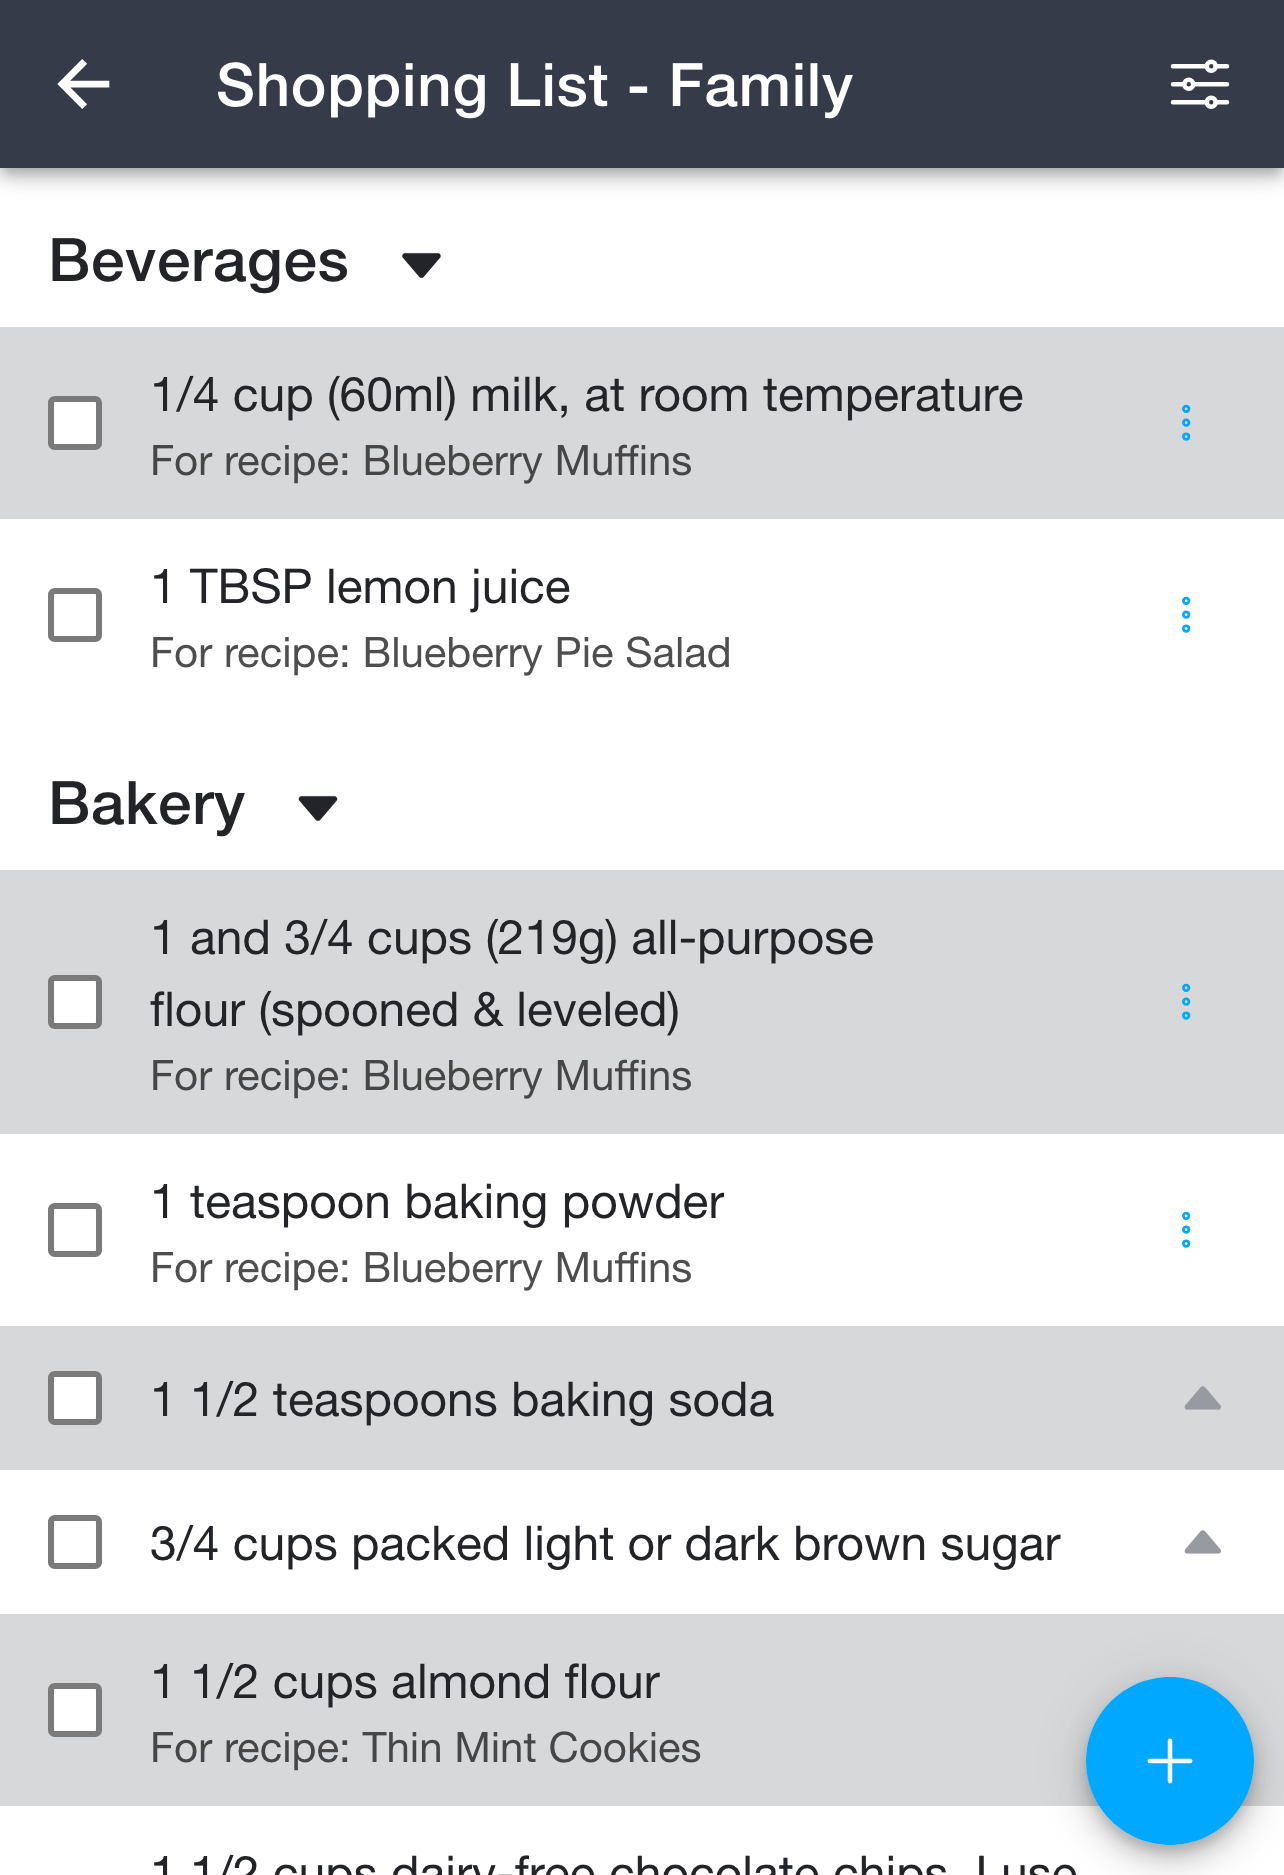
Each item can show the recipe it came from, and a checkbox to mark it as bought. The three-dot menu on the right of an item lets you move it to a different category, as covered in 📖 Recategorizing an Item.
Changing Sort Order
You can change the order in which items are sorted via the options menu in the top right corner.
When sorting alphabetically, RecipeSage orders items by the ingredient name and ignores any leading measurement and unit where possible, so "3 cups flour" sorts under "flour" rather than "3".
Printing
You can print the shopping list via the options menu in the top right corner.
Grouping
RecipeSage can do a bit of smart grouping of your shopping list items by parsing the text in the item title.
Group Similar Items
To enable this feature, open the options menu in the top right corner of the shopping list and enable the "group similar items" toggle.
When this option is enabled, RecipeSage will combine any items that appear to be the same ingredient under one header, as well as combining the associated measurements into a "total" measurement. You can use the arrow next to the shopping list group to show each of the real items within the group RecipeSage generated for you.
When enabled, you'll see two items such as "1 cup sugar" and "1 tbsp sugar" combined into "1 cup, 1 tablespoon sugar", with an arrow on the right side of the combined item allowing you to view the individual items within if desired.
Group Items by Category
To enable this feature, open the options menu in the top right corner of the shopping list and enable the "group items by category" toggle.
When this option is enabled, RecipeSage will do it's best to put your items under their associated category - for instance "dairy". You can expand and collapse these categories by tapping the category title.
Recategorizing an Item
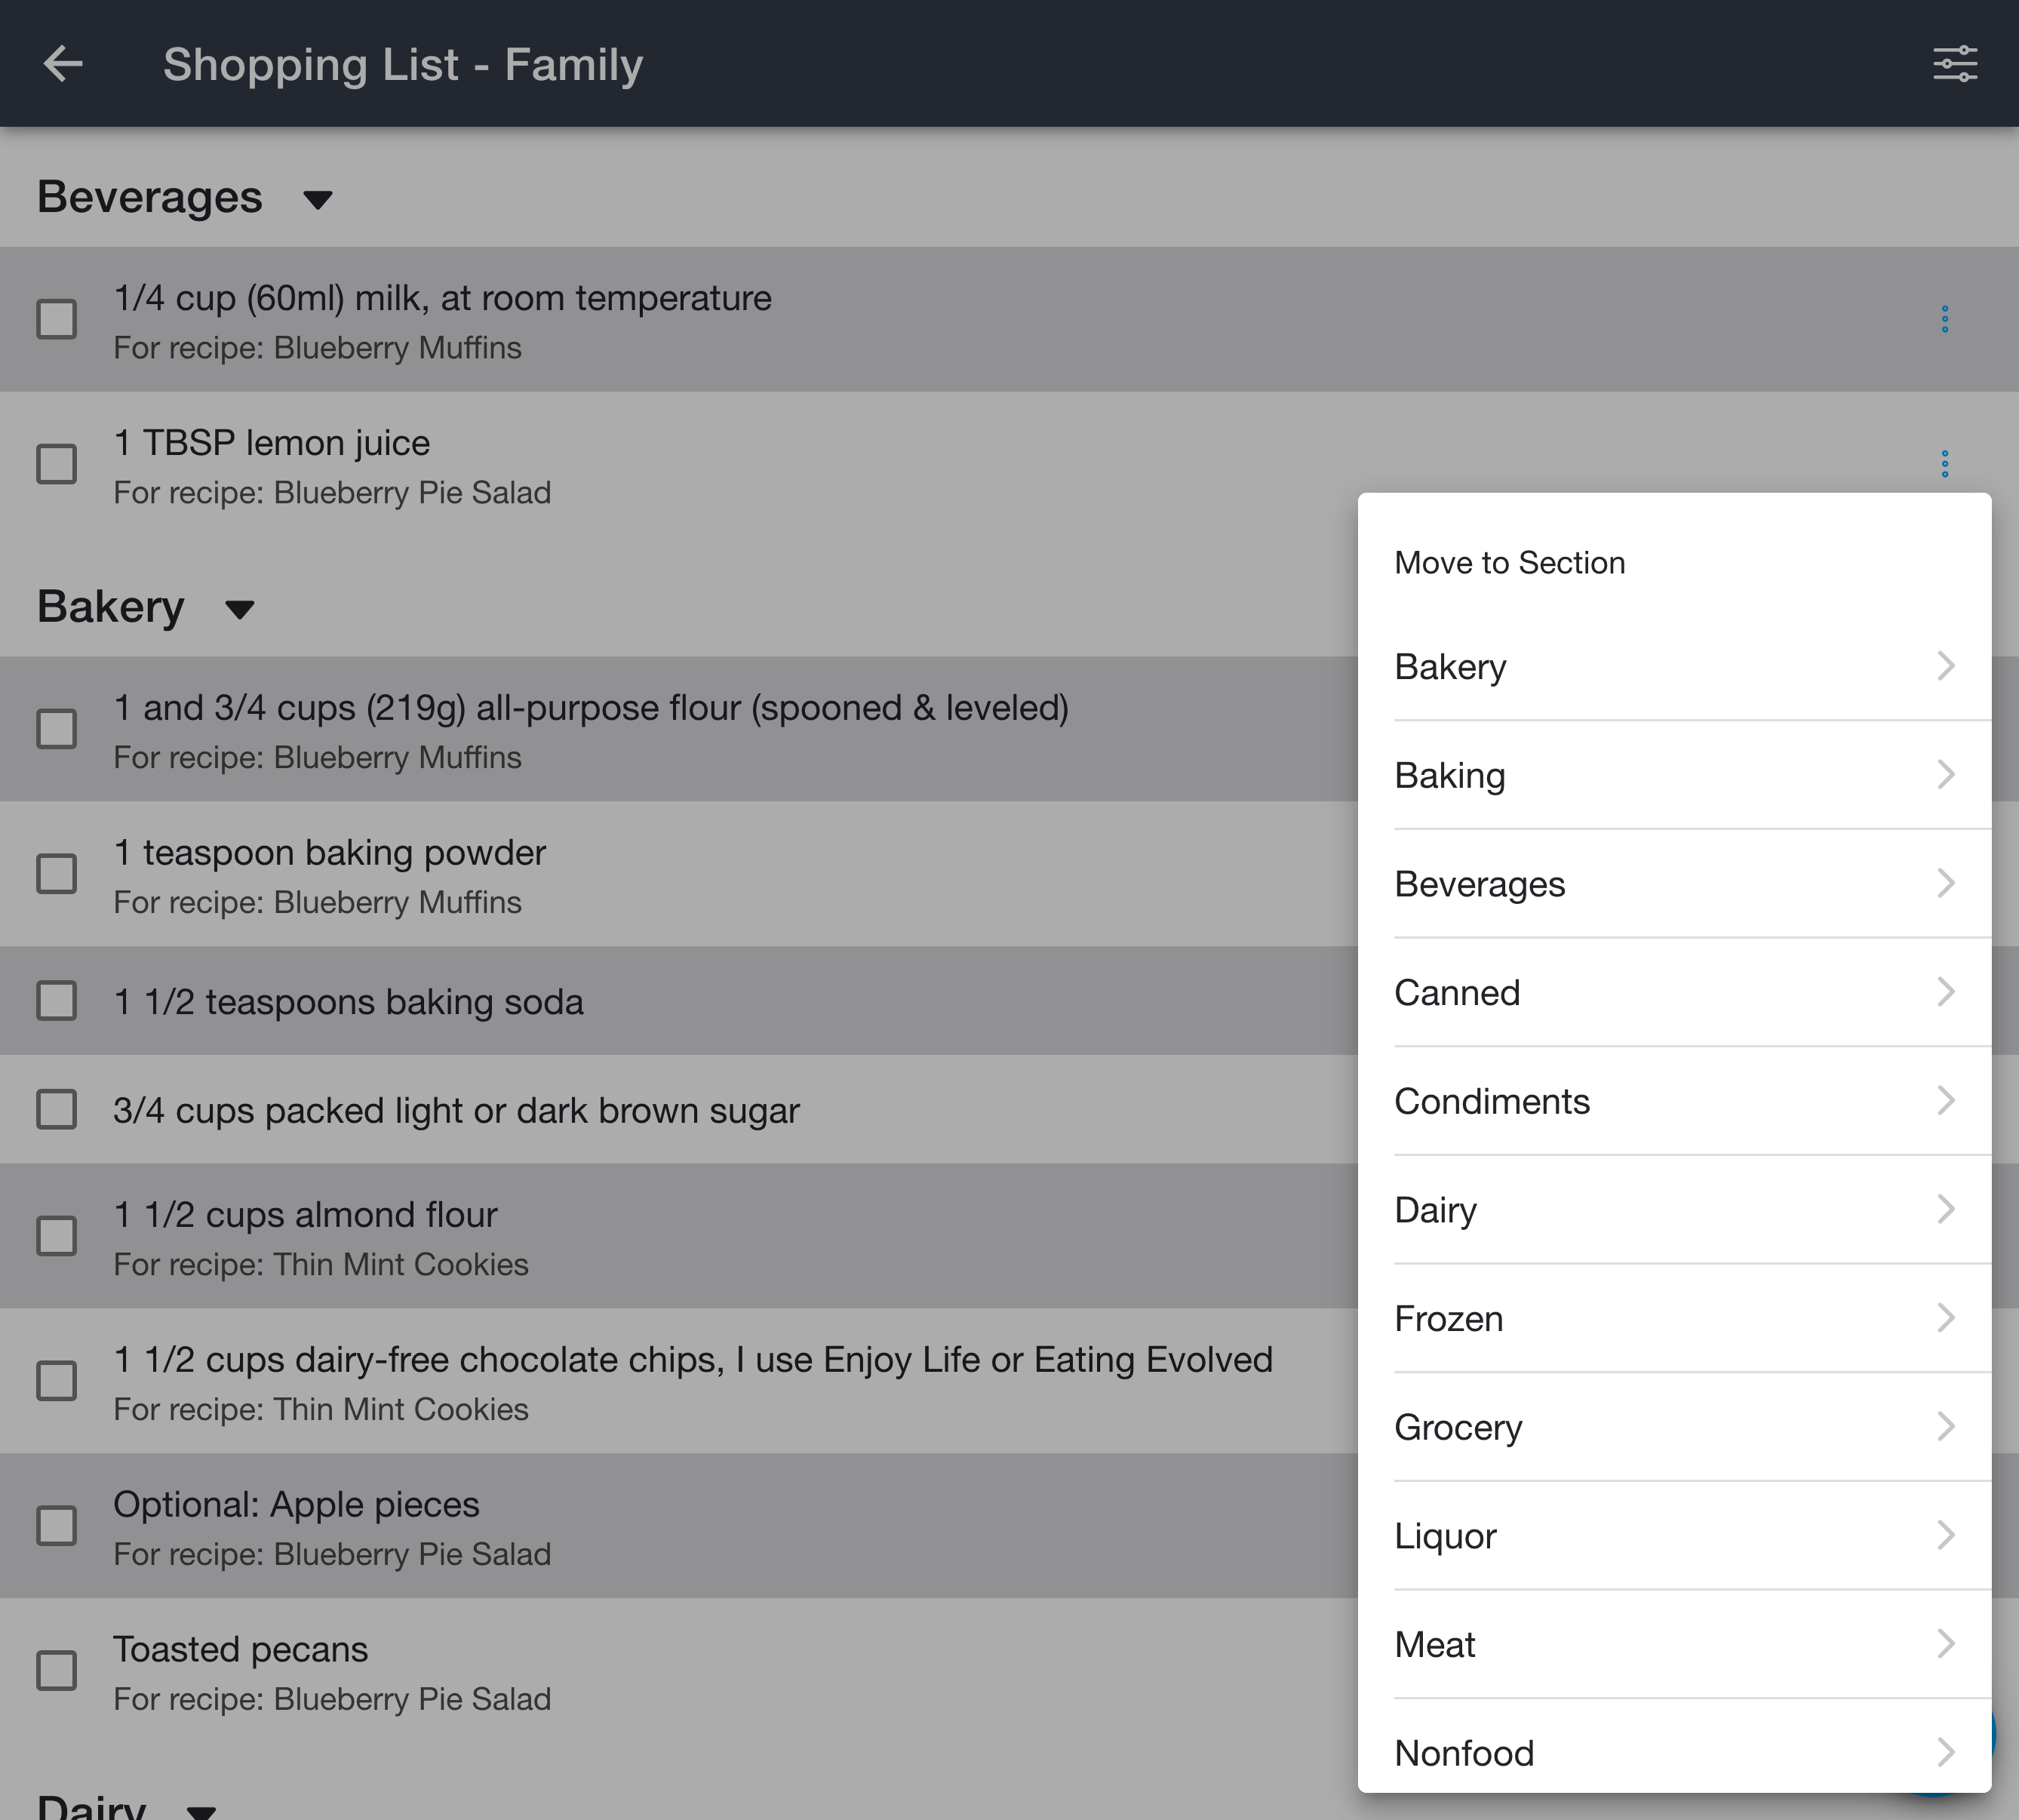
If RecipeSage puts an item under the wrong category, you can move it yourself. Tap the three-dot menu on the right of the item and choose "Move to Section", then pick the category you'd like. The list includes all of the built-in categories, along with any custom categories you've already created.
If none of the categories fit, choose "Custom Category" at the bottom of the menu and type your own category name. Custom categories you create are remembered, so they'll appear in the "Move to Section" list the next time you recategorize an item.
Changing Category Order
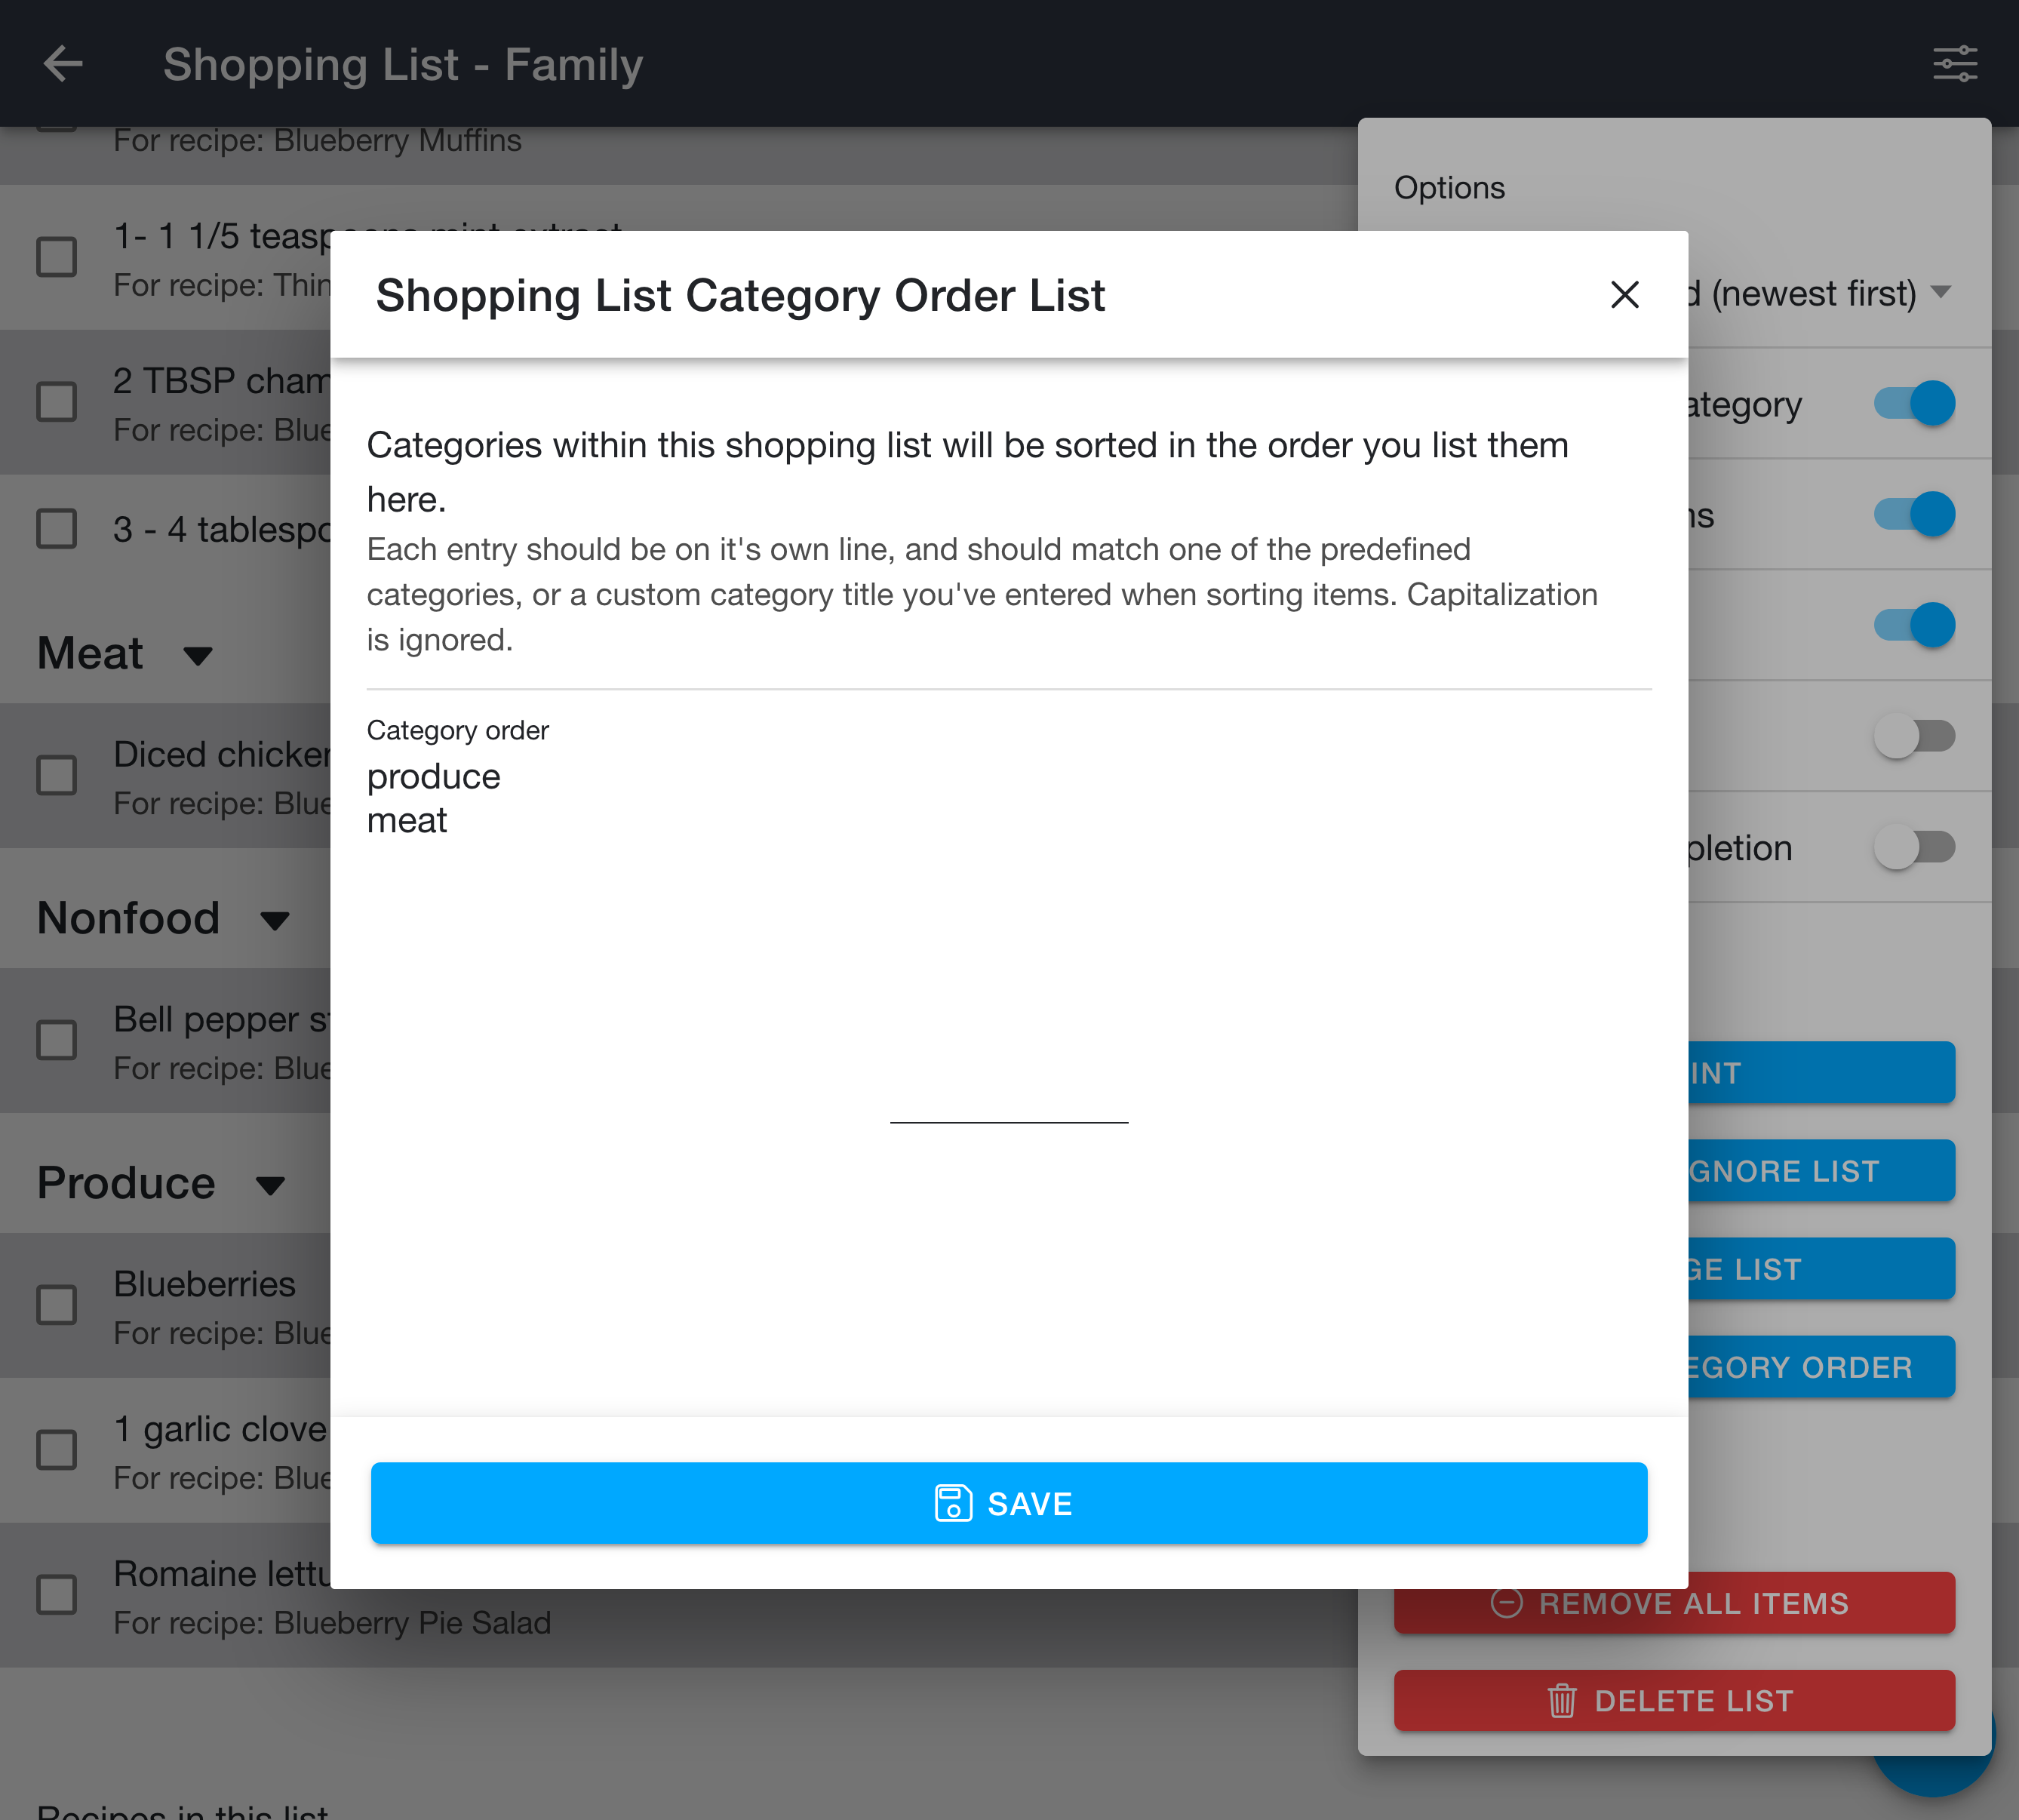
By default categories appear in a standard order. If you'd like them to follow the layout of your own grocery store instead, you can set a custom order. Open the options menu in the top right corner of the shopping list and click "Change Category Order" (available if you own the list).
Enter one category name per line, in the order you'd like them to appear. Each entry should match one of the built-in categories or a custom category title you've used when sorting items. Capitalization is ignored. Any categories you don't list will appear after the ones you did.
Item Ignore List
The ignore list lets you specify ingredients that should be automatically excluded when adding a recipe to a shopping list. This is handy for staples such as salt or water that you likely keep on hand and don't want added every time.
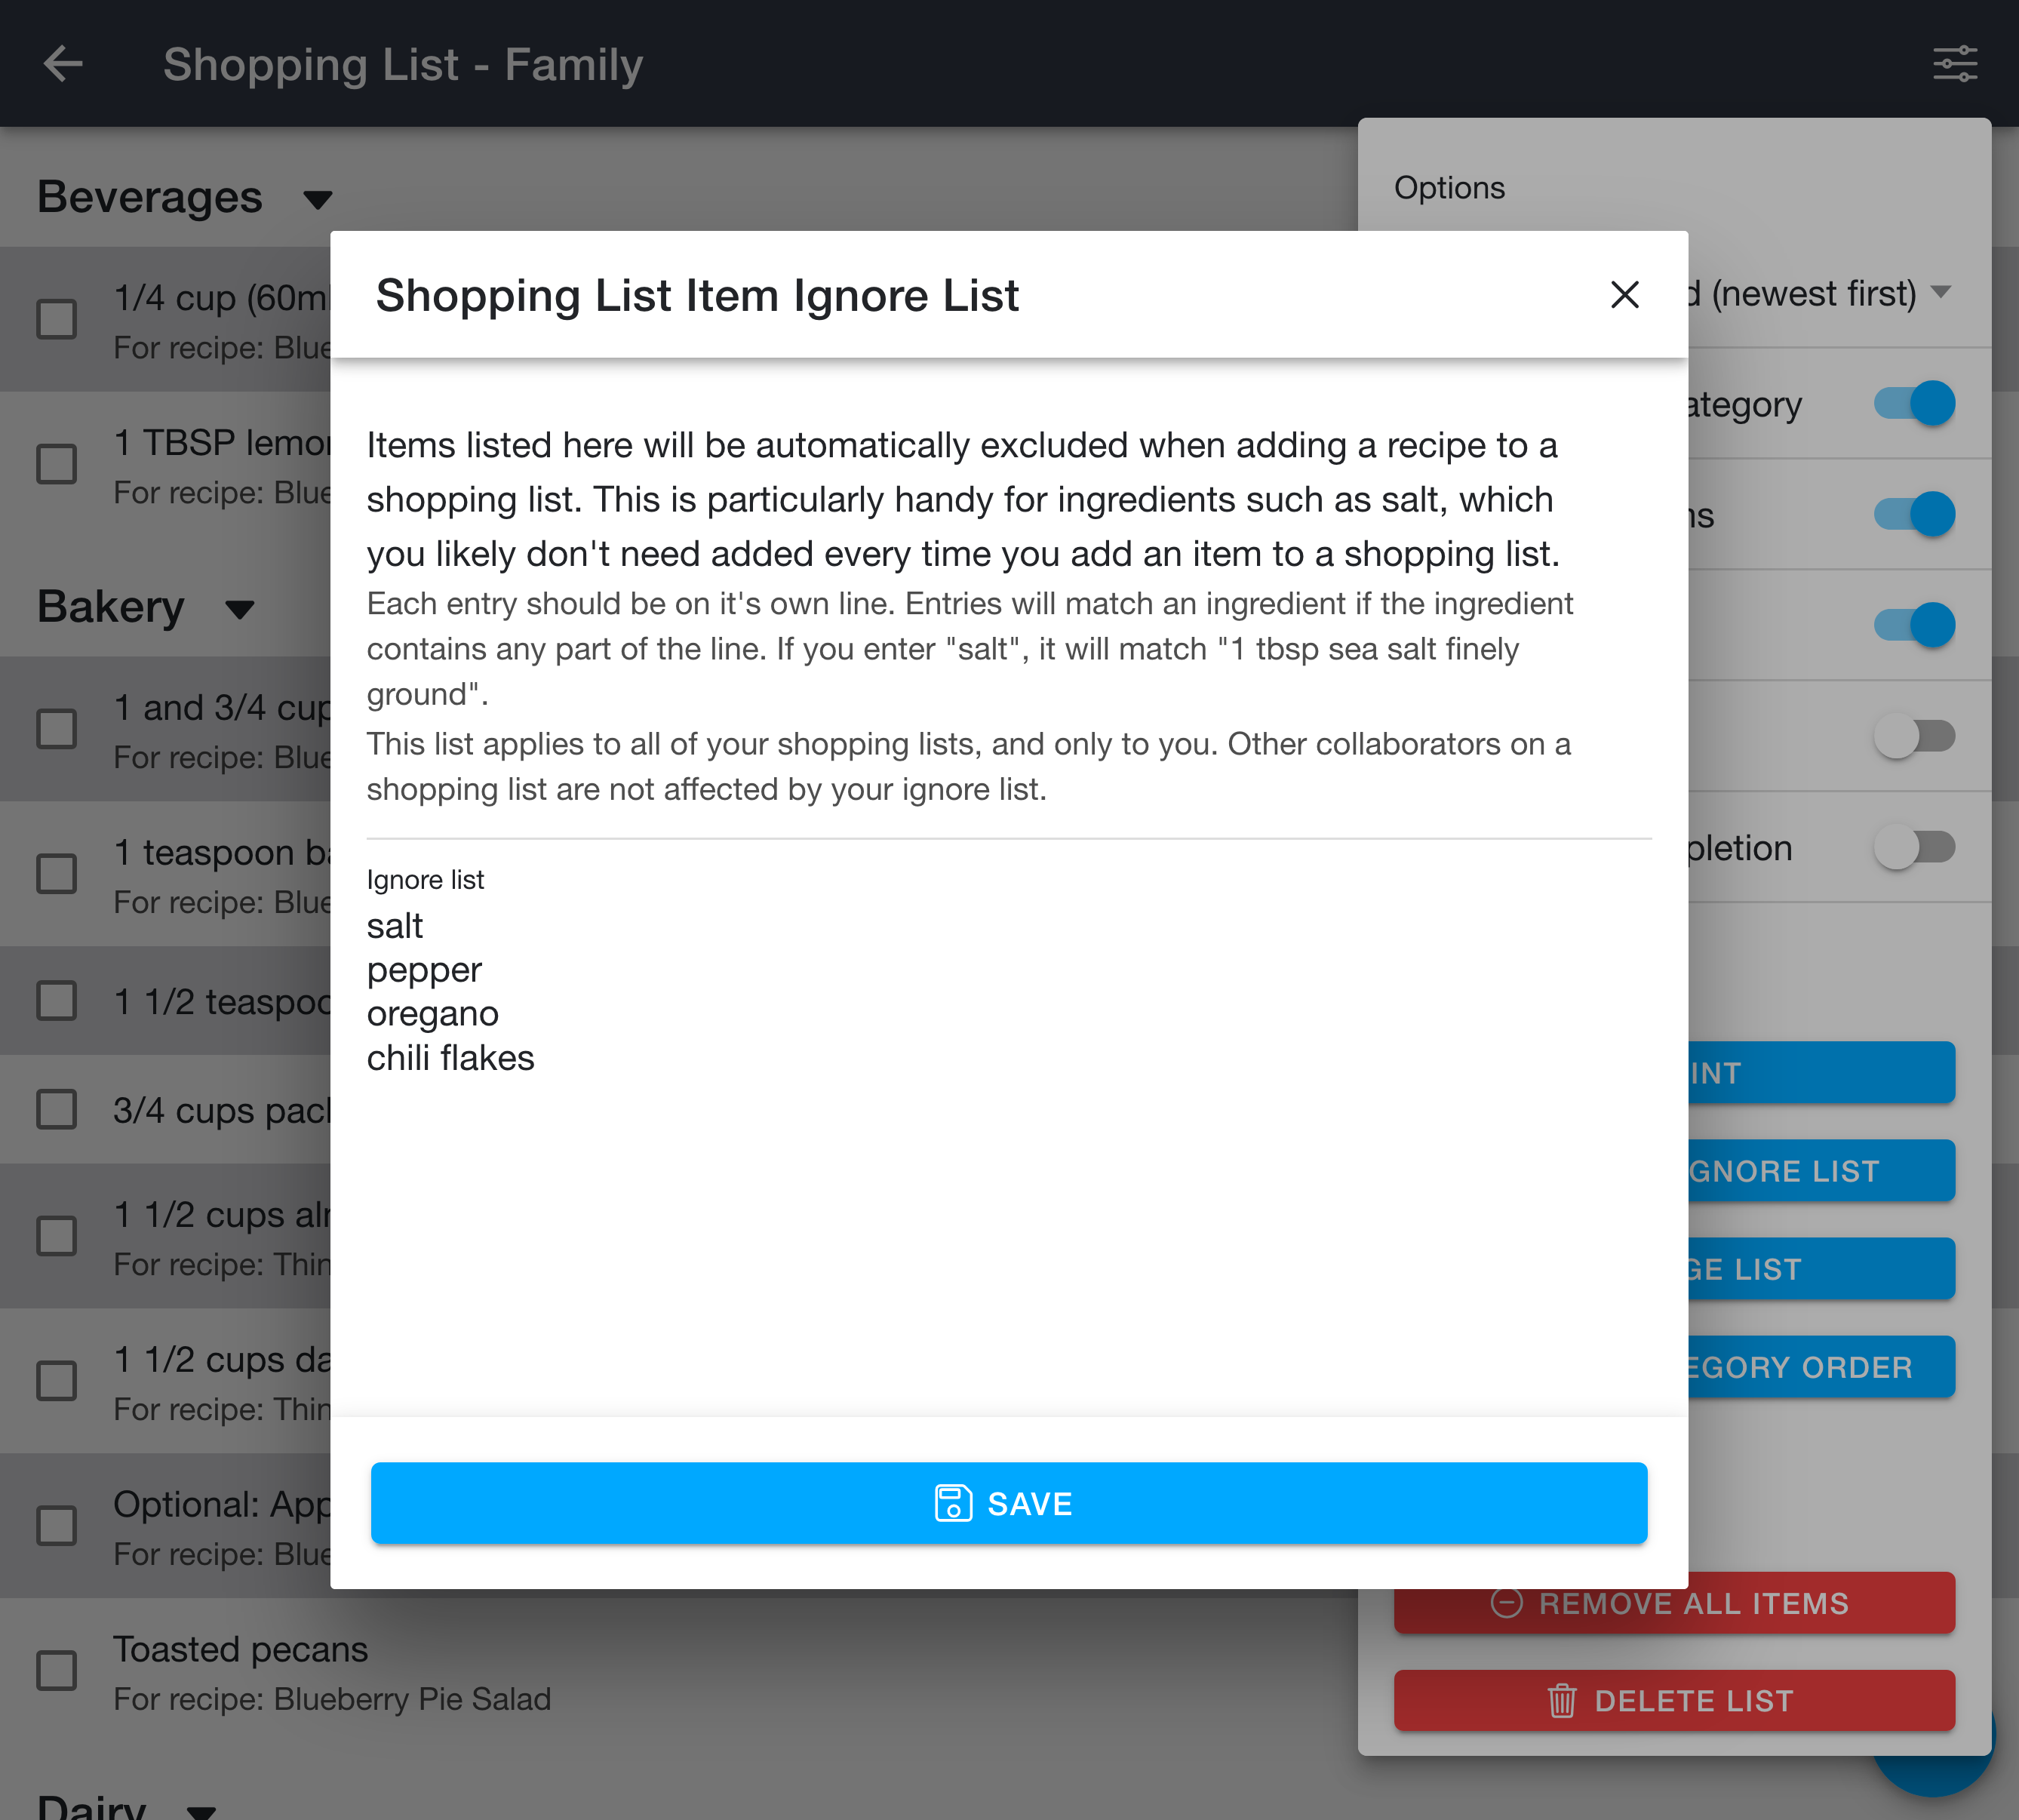
To edit it, open the options menu in the top right corner of the shopping list and click "Edit Item Ignore List". Enter each keyword on its own line. An entry will match an ingredient if the ingredient contains any part of the line, so "salt" will match "1 tbsp sea salt finely ground".
The ignore list applies to all of your shopping lists, and only to you. Other collaborators on a shared shopping list are not affected by your ignore list.
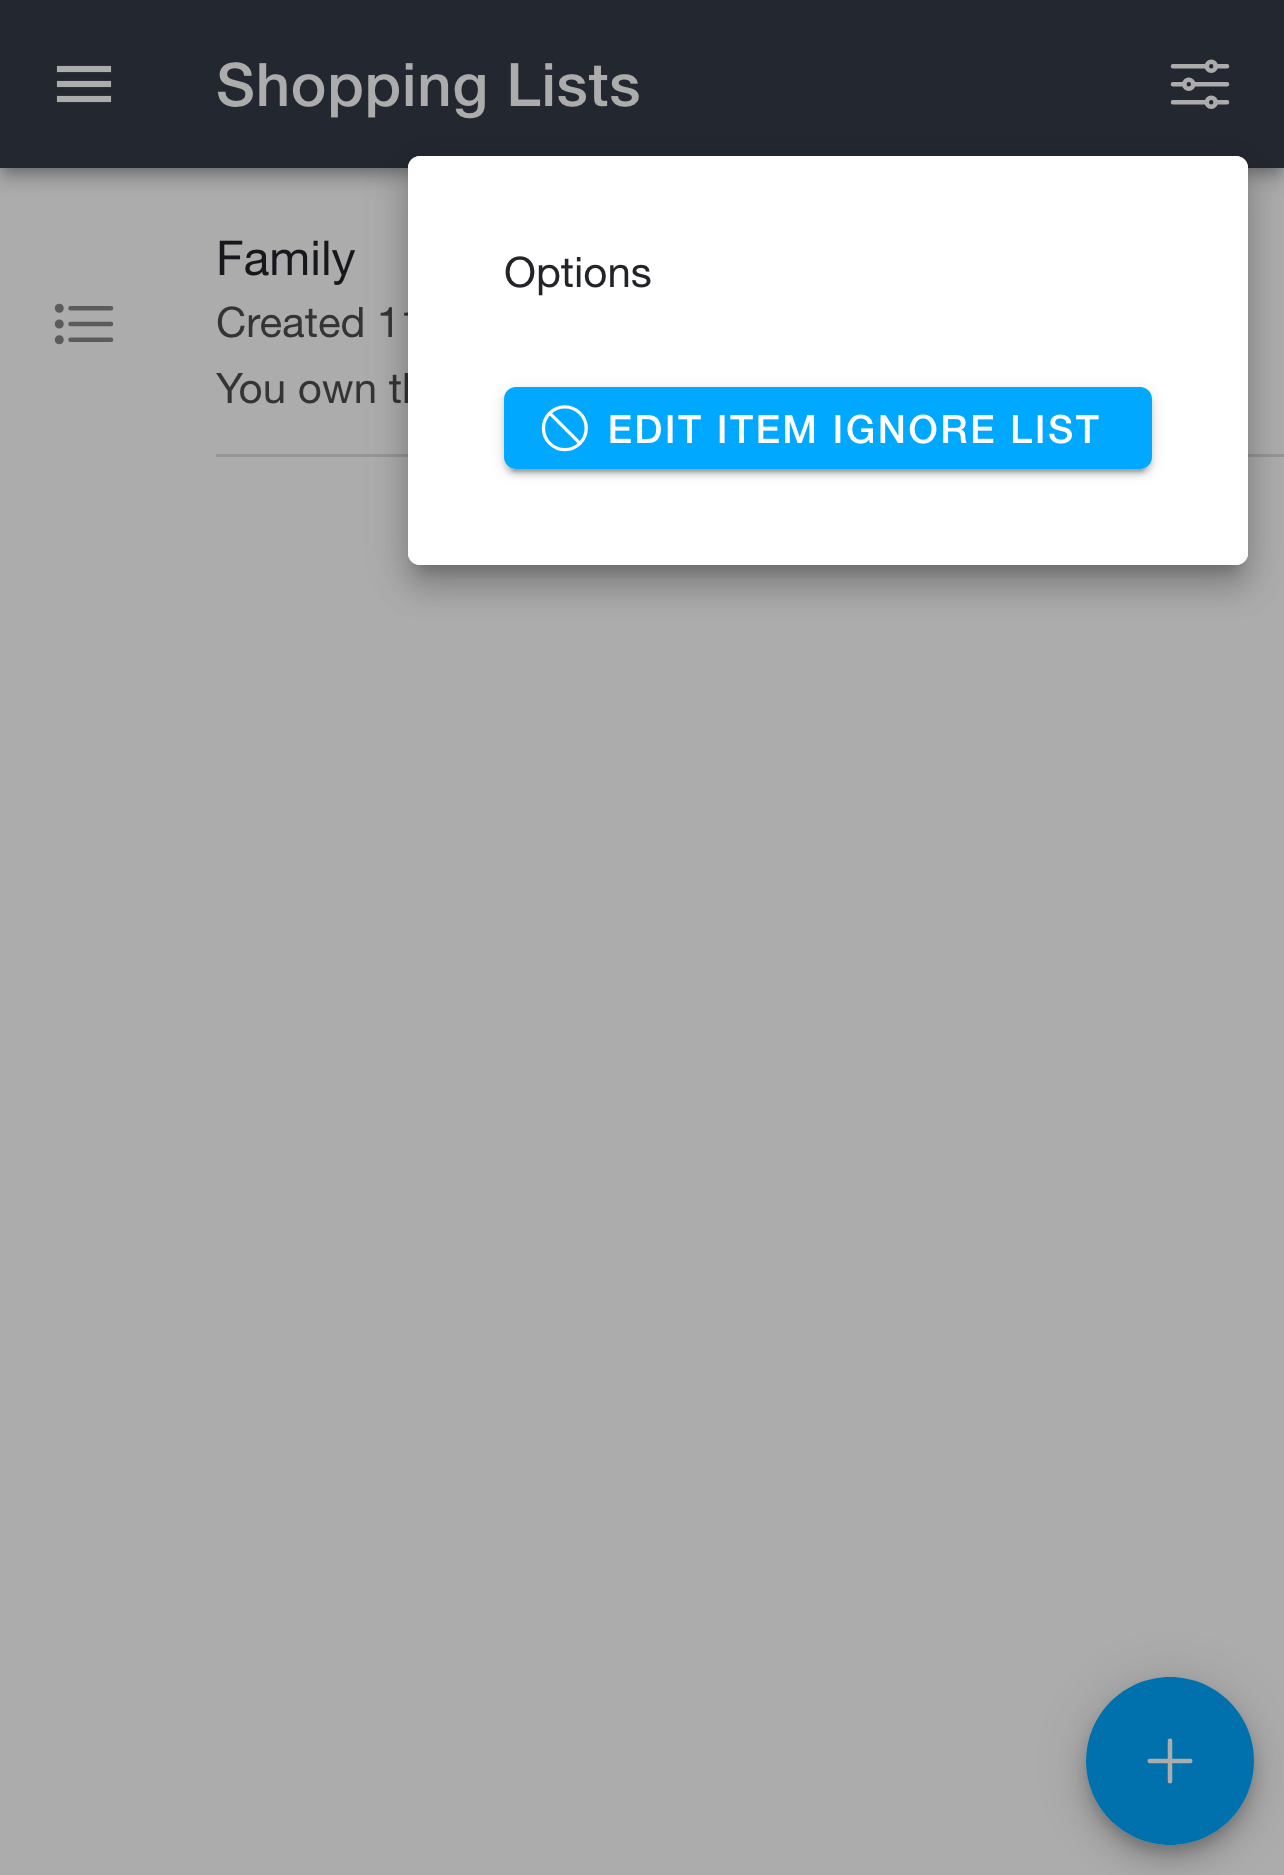
Because the ignore list is shared across all of your lists, you can also reach it from the options menu on the main 📱 Shopping Lists page, without opening a specific list.
Recipes in This List
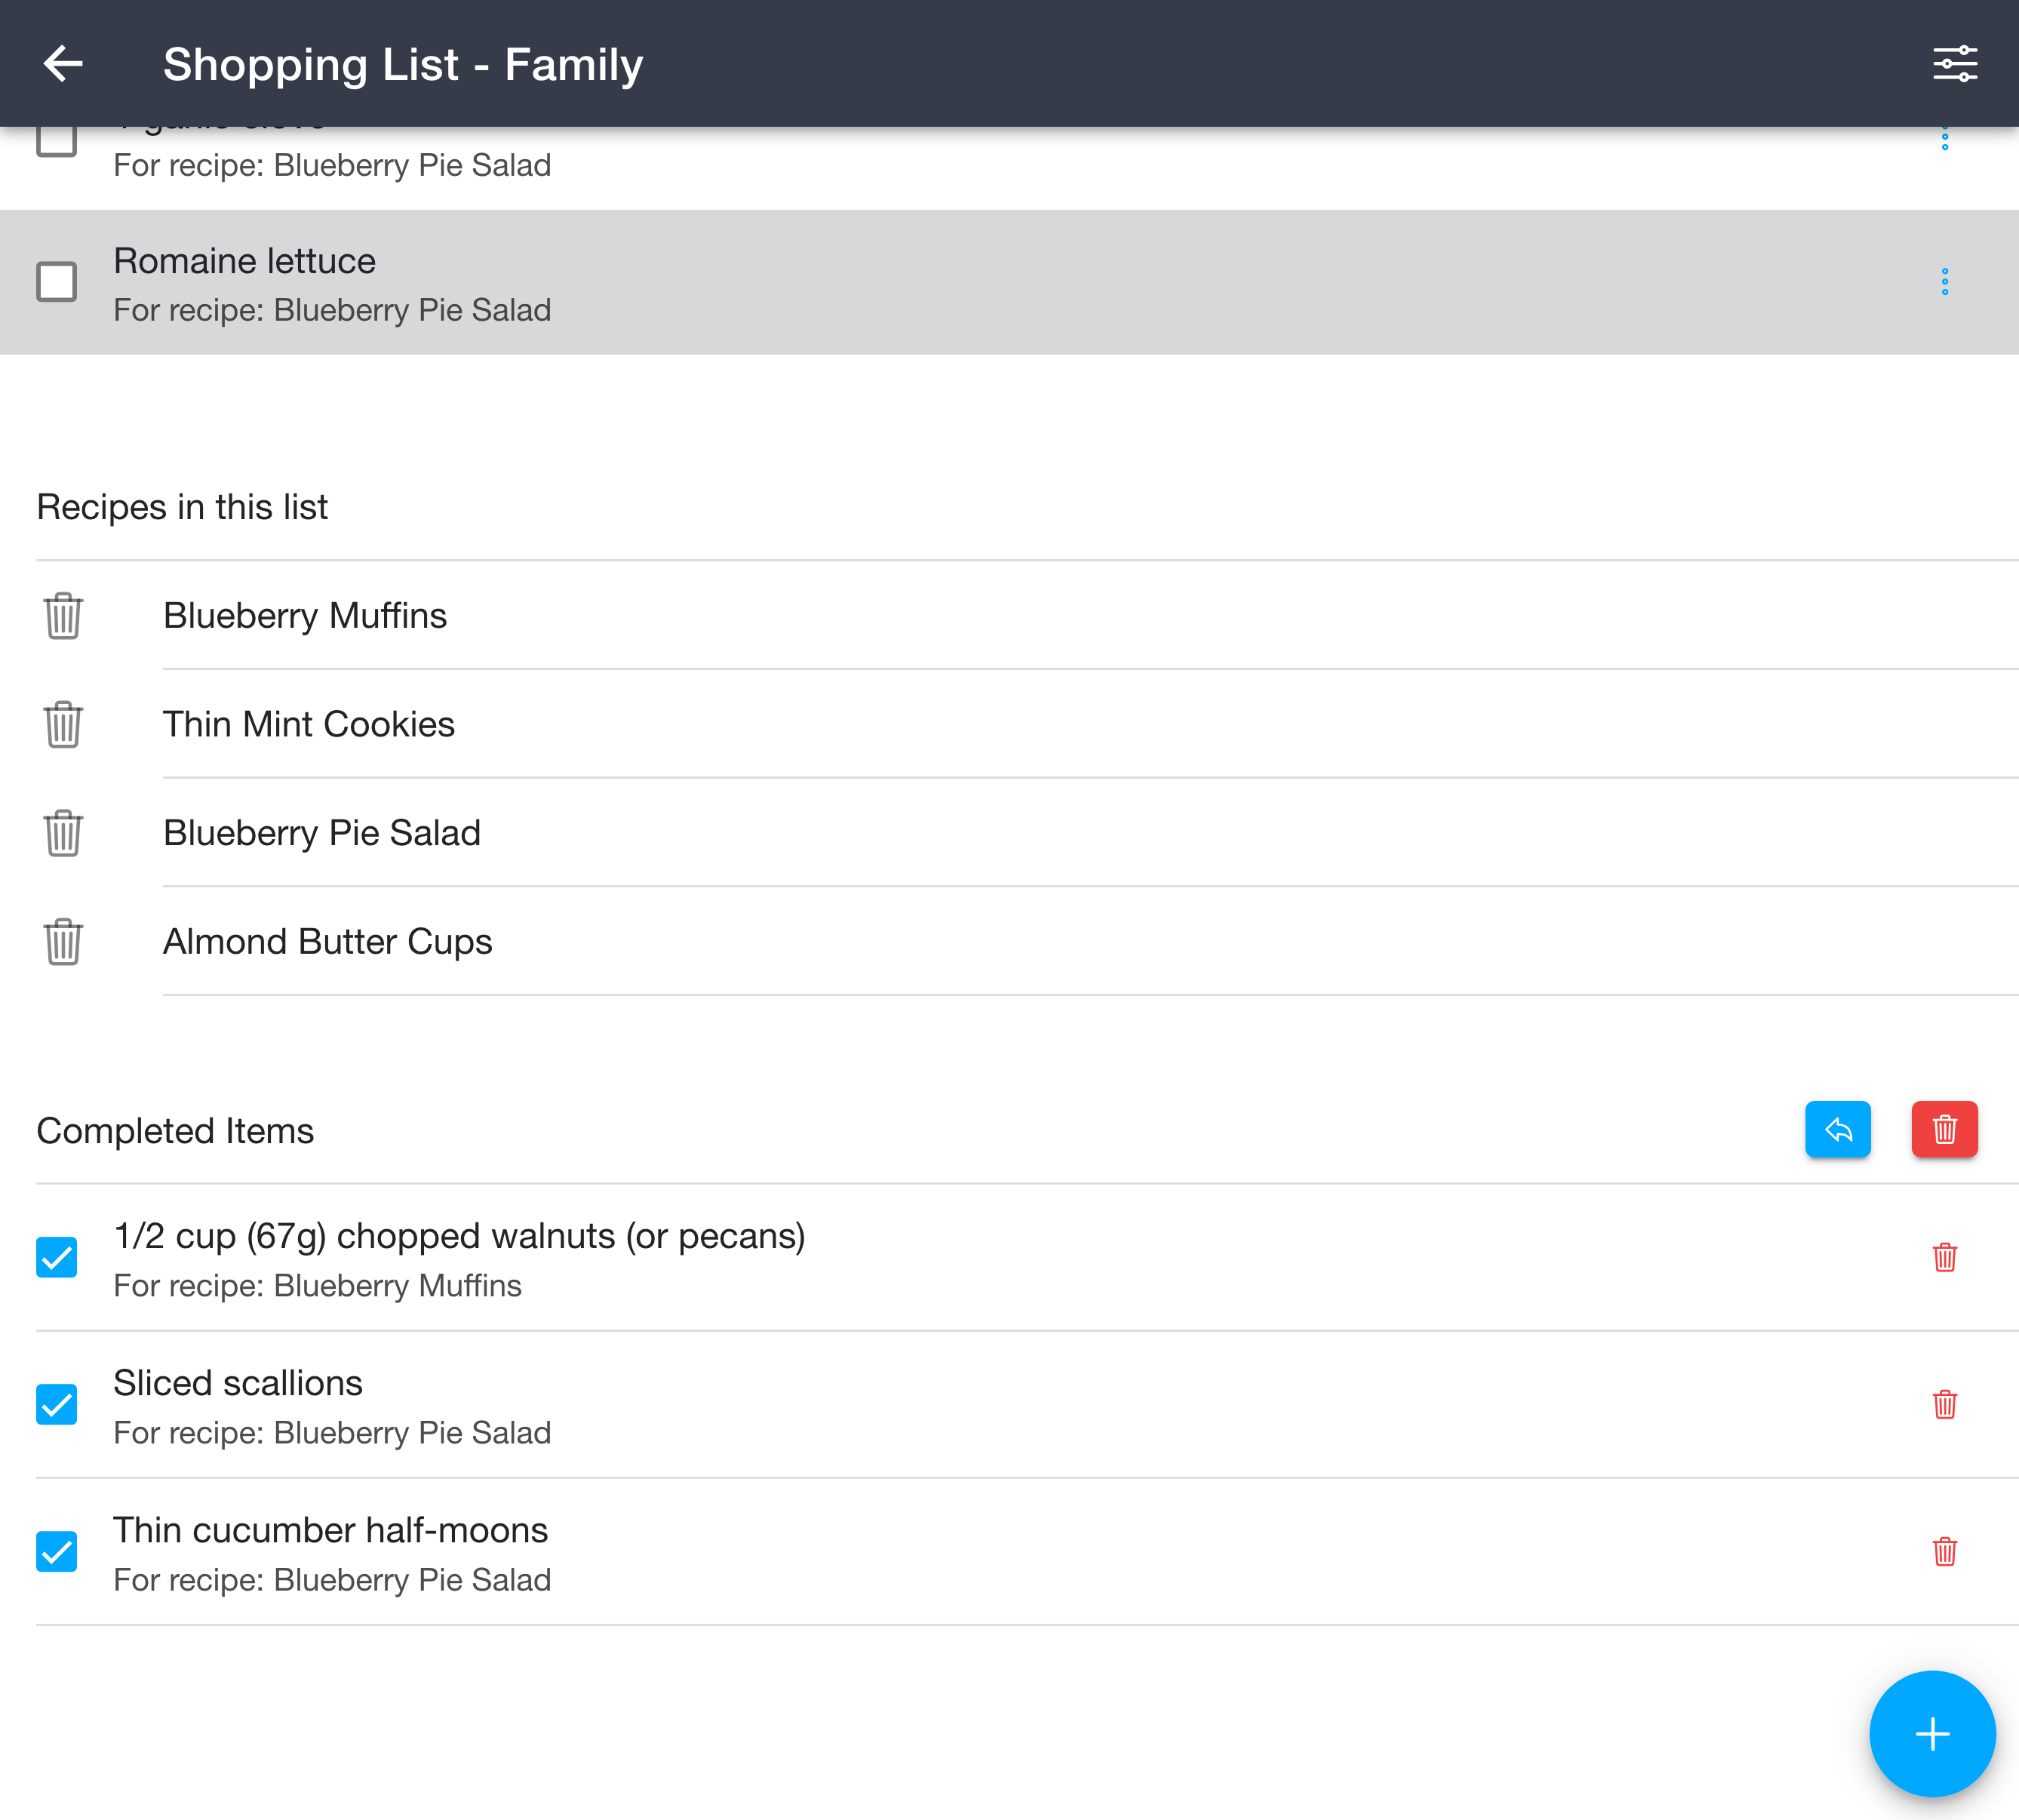
When you add a recipe to a shopping list, it is tracked in a "Recipes in this list" section below your items. Click a recipe title to open that recipe, or click the trash can icon next to it to remove the recipe and all of the items it added to the list in one step.
The screenshot above also shows the "Completed Items" section directly beneath, which appears once you start 📖 marking items as completed.
Marking Items as Completed
To mark items as completed, you can simply check the checkbox next to the item. The item will then be moved to a category at the bottom called "completed items". You can see this "completed items" section at the bottom of the 📖 screenshot above.
Completed Items
Restoring Completed Items
To restore a completed item, simply uncheck the checkbox next to the item title in the list of completed items. It will then be moved back to the items list.
To restore all completed items, click the arrow icon in line with the "completed items" header. If you don't see the "completed items" header, you don't have any completed items.
Deleting Completed Items
To delete all completed items permanently, click the trashcan icon in line with the "completed items" header. If you don't see the "completed items" header, you don't have any completed items.
Deleting Items Immediately
If you'd prefer for items to be instantly deleted rather than being moved to the "completed items" category, you can enable that via the options menu on the shopping list page. Simply enable the "delete upon completion" toggle. Items will be immediately (and permanently) removed when you check them off.
Offline Use
Shopping lists can be edited while offline. You can add new items, check items off, restore completed items, and delete items without a network connection. Your changes are stored locally and will automatically sync to the server (and to anyone you share the list with) once your connection is restored.
This is particularly useful when shopping in stores with patchy mobile coverage. Items you tick off while offline will stay ticked off and won't be lost when you come back online.
Options
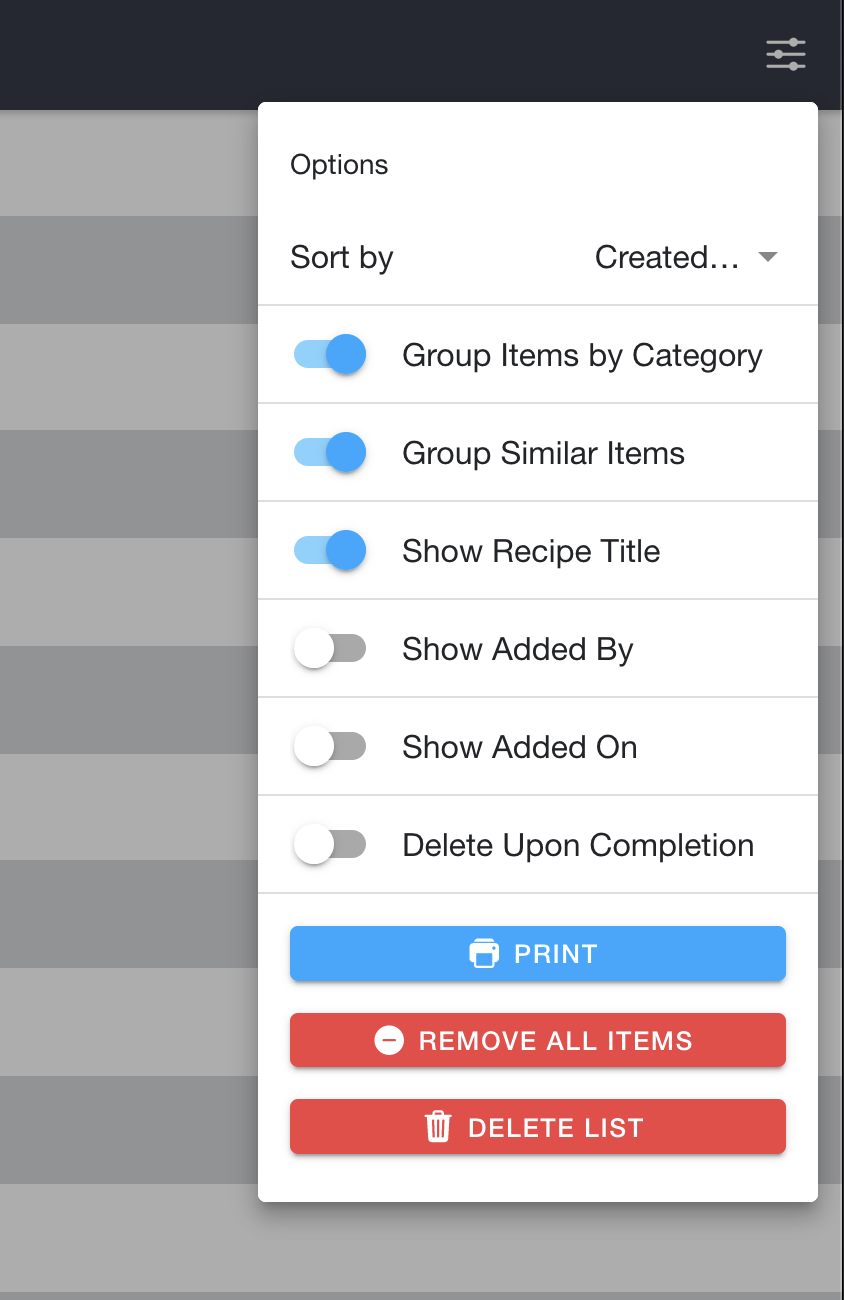
- Sort by: Allows you to change the sort order of the items shown within the shopping list.
- Group Items by Category: Enabling this toggle will enable the 📖 Group Items by Category feature.
- Group Similar Items: Enabling this toggle will enable the 📖 Group Similar Items feature.
- Show Recipe Title: Toggles whether the recipe each item came from is shown beneath the item.
- Show Added By: Toggles whether the collaborator who added each item is shown. This option only appears when the list has collaborators.
- Show Added On: Toggles whether the date each item was added is shown.
- Delete Upon Completion: Enabling this toggle will enable 📖 Deleting Items Immediately.
- Print: This option is covered in the 📖 Printing section.
- Edit Item Ignore List: This option is covered in the 📖 Item Ignore List section.
- Manage List: Opens the list editor where you can rename the list and add or remove collaborators. Only available if you own the list. See 📖 Sharing an existing shopping list.
- Change Category Order: Covered in the 📖 Changing Category Order section. Only available if you own the list.
- Remove All Items: Clicking this button will delete all items on the shopping list.
- Delete List: Clicking this button will delete the shopping list and all associated items.